
Data
Currently, the main source FIND accepts for data are FCS 3.0 formatted data files. These files contain a great deal of useful information that FIND can make use of to provide a better user experience. However, FIND can also open CSV (comma separated value) files in the following format:
"FSC-A","SSC-A","PI (live-dead)-A","GFP-A"
389.850006103516,2.46000003814697,-14.7600002288818,1739.21997070312
.
.
.
Additional file formats may be used as a source if a plugin is available to handle them.
Opening files
Flow Cytometry (FC) data files are opened through the File >> Open... menu item in the FIND interface. As mentioned in the previous section, the main data source are FCS 3.0 files, and those are enabled for selection by default. The screenshots below illustrate the process of opening single or multiple files.
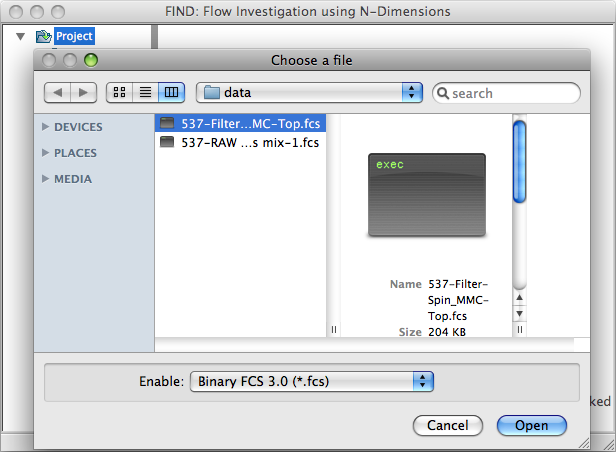
Open File dialog with FCS 3.0 selected by default
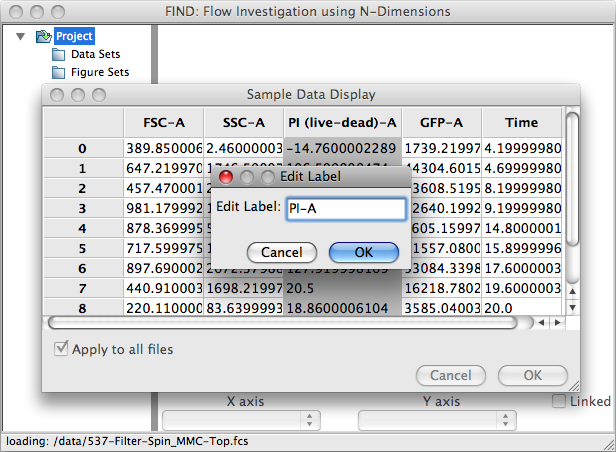
After choosing your file(s) the Sample Data Display window appears with all the channels and the first ten rows of data visible. The data grid allows you to rearrange columns by clicking on the column header and dragging to the desired position. Double clicking on the column header allows you to rename the channel, as illustrated above. If you are opening multiple files with the same column order, check the ‘Apply to all files’ option. This will apply the column order and names to all following files.
Note
When opening multiple files, FIND assumes each experiment represented by the files was done with the same channels, and will use the channel names from the first opened file to populate the Dimension Selection dropdowns.
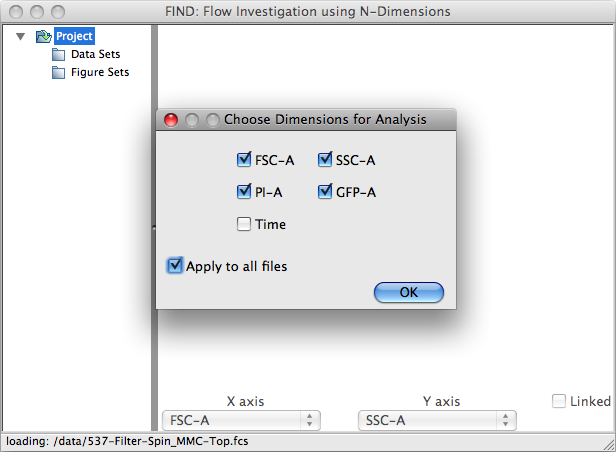
The second dialog displayed when opening FC data files allows you to specify which channels are used when applying automated analysis tools such as clustering algorithms. For example, in many cases the automatically recorded Time channel does not provide useful information for classifying cells. In the screenshot above, it has been deselected. Again, by selecting ‘Apply to all files’ the selections made here will automatically be applied to the rest of the files being opened.
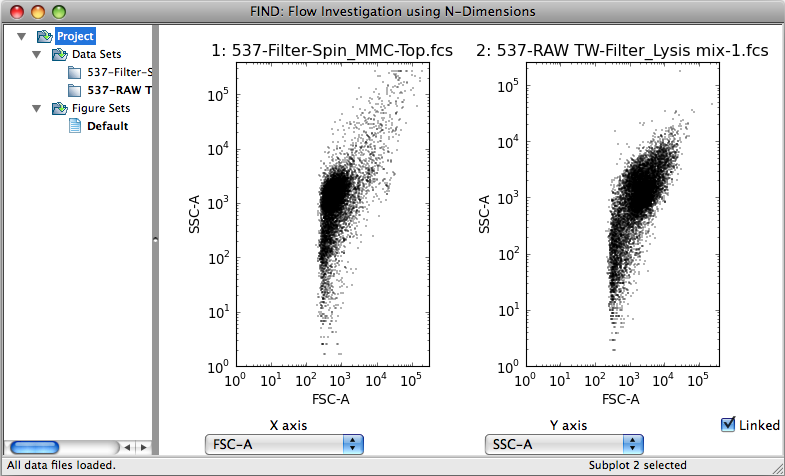
The two screenshots below illustrate the result of opening, respectively, one
and multiple files. FIND automatically plots a 2D scatter plot of the first two
channels for each opened file. For multiple files, the plots are arranged in
an n x 2 (rows, columns) format where n is half the number of
opened files.

Exporting Data
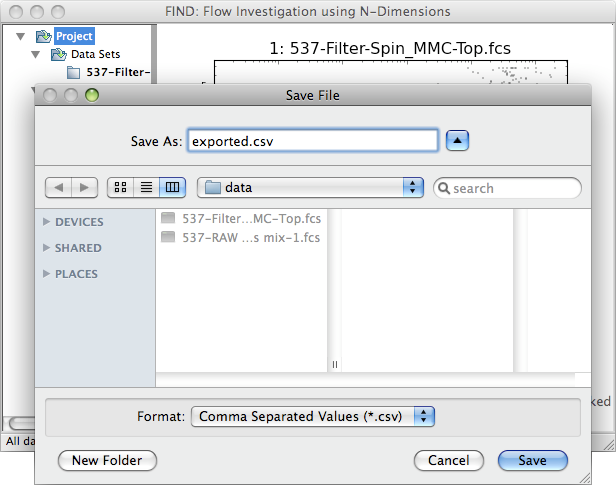
Through the File>>Export... submenu you can save the currently selected data item to file. The specific export type is selected directly as an option in the submenu. FIND currently has the ability to export to CSV, but any IO plugin may implement an export file type.
Note
This can be coupled with the Isolate Clusters tool (see Data Analysis section) to export clusters to external files in order to perform analysis and/or visualization with other programs.
Saving and Restoring the Project
FIND allows you to save the entire state of the analysis as two files: one containing all the qualitative information about data structure, attributes, and visualizations, the second a simple binary file containing all the loaded numeric data. These two files can be packaged and transported in any manner for later use on the same machine or any other machine running FIND. To save your project, use the File>>Save Project... menu action (Ctrl-S on Windows or Command-S on OS X). The file you specify will be saved as a .find file and a .npz file. To load a previously saved project, use the File>>Load Project menu action (Ctrl-L on Windows or Command-L on OS X) and select the .find file of the project you want. Everything will be restored as it was when the project was saved.